Posts

Showing posts from June, 2012

[HOW TO] Install latest Keymon in Xubuntu

Image
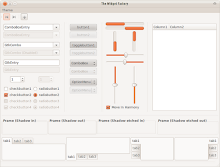
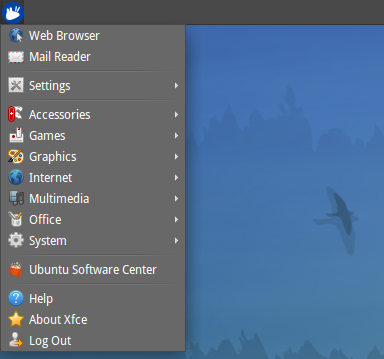
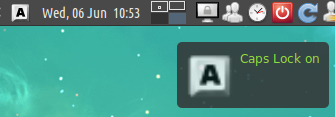
key-mon is utility to show live keyboard and mouse status for teaching and screencasts. Install Navigate to keymon download page and download the deb file with the highest version number (1.13-1 at the time of this writing), then open a terminal window, change current directory (cd) to the download directory and run: sudo apt-get install python-xlib -y sudo dpkg -i keymon_*.deb Usage key-mon can be accessed via Applications Menu > Graphics > KeyMon or by typing key-mon on a terminal. When key-mon is running, it'll show the keyboard and mouse events. If you right click inside the key-mon window you can access its settings and enable window decoration, which is useful for moving the window around. References Keyboard Status Monitor (key-mon) at Google Code Display your pressed keyboard buttons with Keymon

Radeon open source driver power saving

Kernel Mode Settings (KMS) is available in the radeon open source driver since Ubuntu Karmic Koala 9.10. KMS allows automatic hardware settings detection and there are two power saving methods available in KMS: Dynpm and Profile . !If you're using the proprietary ATI driver (fglrx), ignore this article! Dynpm The Dynpm method dynamically changes the GPU frequency on demand. So when an intensive task is being is executed the frequency is increased to provide more performance. To enable the Dynpm method , open a terminal window and run: sudo sh -c "echo dynpm > /sys/class/drm/card0/device/power_method" Profile With the Profile method the GPU frequency is adjusted according to profile settings. There are 5 power profiles: default, uses default clocks/volts low, forces GPU to lowest available frequency; may cause some issues on certain laptops and displays, as this is the mode used when the display switches to dpms off mode mid, forces GPU to be

[HOW TO] Install Ambiance and Radiance Themes in Xubuntu (ppa)

Image
Ambiance and Radiance are two Gtk themes and they have a version compatible with Xfce/Xubuntu. Ambiance has dark panel, dark toolbar and dark window title bar, while Radiance displays this elements with light colors. There are also some color variations for each theme: Blue, Graphite, Green, Orange, Pink, Purple, Red and Yellow. Radiance theme at top left and Ambiance at top right. The panel appearance of each theme is beneath it. At the bottom are two color variations of the Ambiance theme. Install Open a terminal window and run: # Add Ravefinity Project PPA sudo add-apt-repository ppa:ravefinity-project/ppa -y # Update package information and install ambiance and radiance themes sudo apt-get update && sudo apt-get install ambiance-xfce-lxde radiance-xfce-lxde # Install other colors variations (blue, green, purple, ...): sudo apt-get install ambiance-colors-xfce-lxde radiance-colors-xfce-lxd

Easy window resizing in Xfce/Xubuntu

Image
Simply hold the Alt key, right-click somewhere inside the window and drag to resize. References Window resizing in Xubuntu (and Xfce)

[HOW TO] Graphically edit Xfce/Xubuntu Applications Menu

Image
Xfce/Xubuntu Applications Menu is a panel plugin that displays a menu that allows access to installed applications. Xfce/Xubuntu Applications Menu The items on the menu can be edited using one tool called Alacarte. Alacarte can be access at Applications Menu > Settings > Main Menu or just type alacarte in the command line (or in xf4run). Main Menu editor's (alacarte) interface The Main Menu editor has 3 main sections: Menus list (left), Items list (center) and Action buttons (right). The Menus list sorts applications by category. Each menu can hold items and other menus (a menu has to possess at least one item to be displayed). The available action buttons for menus are "New Menu" and "New Item", and their name is self-explanatory. The Item list displays the list of application launchers for the selected menu/category. Items can be moved up and down on the list and their attributes (name, command...) can be e

Save disk space with apt-get option "no-install-recommends" in Xubuntu

Image
Every package in Ubuntu has a set required packages, a set of recommended packages and a set of suggested packages. The required packages are dependencies, so their installation is mandatory, but the installation of other two sets can be skipped. The recommended and suggested packages are not essential to the functioning of the package being installed. Disabling the installation of recommendations allows to save a lot of disk space. Example 1: recommendations enabled $ sudo apt-get install texworks ... The following extra packages will be installed: lmodern luatex texlive-base texlive-binaries texlive-common texlive-doc-base texlive-latex-base texlive-latex-base-doc texlive-luatex texworks-help-en Suggested packages: perl-tk texlive-xetex texworks-scripting-lua texworks-scripting-python The following NEW packages will be installed: lmodern luatex texlive-base texlive-binaries texlive-common texlive-doc-base texlive-latex-base texlive-latex-base-doc texlive-luatex texwork

lshw-gtk: GUI for accessing hardware information

Image
lshw-gtk is a front-end to lshw (tool to extract detailed information on the hardware configuration of the machine). Install Open a terminal window and run: sudo apt-get install lshw-gtk -y # Replace su-to-root for gksu in the *.desktop file sed 's/su-to-root -X -c/gksu/g' /usr/share/applications/lshw-gtk.desktop > ~/.local/share/applications/lshw-gtk.desktop Usage To get accurate information, lshw-gtk should be run as root: gksu lshw-gtk It can also be accessed via Applications Menu > Settings > Hardware Lister . References Como ver os componentes do computador (hardware) lshw(1) - Linux man page

[HOW TO] Create QR Codes in Xubuntu 12.04

Image
A QR code is a type of barcode that consists of black modules arranged in a square pattern on a white background. It's a compact way of providing information and a smartphone can be used for reading that information. Qreator is an application that can create QR codes for URL, Text, Location and Wifi Settings. The QR code can be saved as a PNG image file or copied to the clipboard. Install Open a terminal window and run: sudo apt-get install qreator -y OR Click here to install Qreator Usage Qreator is available at Applications Menu > Accessories > Qreator . It can also be accessed with the command /opt/extras.ubuntu.com/qreator/bin/qreator , supplying it one of the following options: Usage: qreator [options] Options: --version show program's version number and exit -h, --help show this help message and exit -v, --verbose Show debug messages (-vv debugs qreator_lib also) -u, --url Create a QR code for a URL -t, -

[HOW TO] Install Inkscape in Xubuntu (ppa)

Image
Inkscape is an Open Source vector graphics editor, with capabilities similar to Illustrator, CorelDraw, or Xara X, using the W3C standard Scalable Vector Graphics (SVG) file format. Inkscape supports many advanced SVG features (markers, clones, alpha blending, etc.) and great care is taken in designing a streamlined interface. It is very easy to edit nodes, perform complex path operations, trace bitmaps and much more. We also aim to maintain a thriving user and developer community by using open, community-oriented development. Some great Inkscape tutorials can be found: here . At FlossManuals there's a Inkscape manual that introduces the program basics. And there's also a "Getting Started Guide" available here , written by Bethany Hiitola. Install Open a terminal window and run: sudo apt-get install inkscape -y References Inkscape. Draw Freely

[HOW TO] Use Xfce4 Dictionary as RSVP program

Image
RSVP stands for Rapid Serial Visual Pepresentation and is a method of displaying information in which the text is displayed word-by-word. It's meant to help increase reading speed and can also help individuals suffering from dyslexia because it helps maintaining the correct word order. To use Xfce4 Dictionary as a RSVP program just click on the 'Speed Reader' button, paste some text in the big input box (or load the text from a plain text file) and after adjusting the settings click 'Start'. Xfce4 Dictionary can be accessed with the command xfce4-dict or clicking on the Applications Menu > Office > Dictionary item. References Speed reading Rapid SerialVisual Representation (RSVP)

[HOW TO] Native look-and-feel for JDownloader in Xubuntu

Image
To make JDownloader look like the rest of your desktop applications in Xubuntu, choose the Settings tabs in the JDownloader interface. Then under Basics > User Interface section choose the Light(GTK) style. After restarting JDownloader (File > Restore JD), it'll have native look-and-feel.

[HOW TO] Install JDownloader in Xubuntu (ppa)

Image
JDownloader simplifies downloading files from One-Click-Hosters like Rapidshare.com or Megaupload.com - not only for users with a premium account but also for users who don't pay. It offers downloading in multiple paralell streams, captcha recognition, automatical file extraction and much more. Of course, JDownloader is absolutely free of charge. Additionally, many "link encryption" sites are supported - so you just paste the "encrypted" links and JD does the rest. JDownloader can import CCF, RSDF and the new DLC files. Install Open a terminal window and run: sudo add-apt-repository ppa:jd-team/jdownloader -y && sudo apt-get update && sudo apt-get install jdownloader -y Actually, this package performs a pseudo-installation. When JDownloader is run for the first time ( Applications Menu > Internet > JDownloader ), it'll be installed in your $HOME , under ~/.jdownloader . After downloading and installing, JDownloader will

[HOW TO] Install mcomix in Xubuntu (ppa)

Image
MComix is a comic book viewer that can read images from plain image files and from compressed image archives (cbr, cbz, zip, 7z, ...). MComix is a fork of the Comix project , and aims to add bug fixes and stability improvements after Comix development came to a halt in late 2009. Install Open a terminal window and run: sudo add-apt-repository ppa:blca/ppa -y && sudo apt-get update && sudo apt-get install mcomix -y Once installed MComix is available under the Graphics section of Xubuntu's Applications Menu. References MComix Website

[HOW TO] Change window title bar theme (xfwm4) in Xubuntu

Image
Click on the "Applications Menu" then select: Settings > Window Manager , if you're running Xfce 4.10 Settings > Settings Manager > Window Manager , if you're running Xfce 4.8 In either case, on the 'Style' tab choose one the of available themes in your system.

[HOW TO] Install desktop themes in Xubuntu

Image
There're three categories of themes: Gtk themes (that control how the window contents is themed), Window title bar themes (known as xfwm4 themes in Xfce/Xubuntu) and icon themes. Xubuntu 12.04 customized with the 'Bluebird' Gtk and xfwm4 themes and 'Faenza' icon theme How to install themes Depending on the category of theme you're installing, extract the theme to one of the following locations: Gtk and xfwm4 themes: ~/.themes Icon themes: ~/.icons Hint: If you're running Xfce 4.10 you can drag-and-drop the *.tar.gz file containing the theme in the dialog for changing the theme. Where to get themes Eyecandy for your GNOME-Desktop - GNOME-Look.org Eyecandy for your Xfce-Desktop - Xfce-Look.org Xfce themes at DeviantART

[HOW TO] Change desktop theme in Xubuntu

Image
Click on the "Applications Menu" then select: Settings > Appearance , if you're running Xfce 4.10 Settings > Settings Manager > Appearance , if you're running Xfce 4.8 On the left: Opening appearance dialog in Xubuntu. On the right: Change appearance dialog in Xubuntu On the Appearance dialog you have the possibility to change the current desktop theme to another one that's installed in your system.

[HOW TO] Disable crash reports in Xubuntu 12.04

Image
Sick and tired of those annoying crash report notifications? Please continue reading to find out how to disable them. Disable Open a terminal window and run: sudo sed -i "s/enabled=1/enabled=0/g" '/etc/default/apport' References Mac OS X Lion Theme for Ubuntu 12.04/12.10/11.10

Bash ternary operation

Ternary operation allows to assign a variable one of two values depending on the evaluation of a Boolean condition. It's also known as conditional operator and inline if. In several programming languages it's expressed using the ?: operator: assign_condition ? value_if_true : value_if_false Bash ternary operation (works for numeric and string conditions) [ condition ] && variable=value_if_true || variable=value_if_false Example b='aaa'; c='bbb'; d [ b == 'zzz' ] && a=1 || a=0 # 0 is assigned to a Bash ternary operation for numeric conditions only (( assign_condition ? value_if_true : value_if_false )) Example b=3; c=10; d=7 (( a = b<5 ? c : d )) # 10 is assigned to a References Ternary operator in Bash (stackoverflow) ?: operator at Wikipedia Ternary operator in bash

Optimize PNG file size with optipng

optipng is an advanced optimization program for Portable Network Graphics (PNG). It optimizes PNG files, reducing their size without losing any information. Install Open a terminal window and run: sudo apt-get install optipng -y Optimize optipng provides more advanced usages, but to reduce the image size, simply invoke optipng with the image name as its argument. The modification is done in place, ie, the changes are applied directly to the image without creating a backup (if you wish to keep a backup supply the -keep option). Example: optipng image.png References optipng(1) - Linux man page A guide to PNG optimization

Install Krita in Xubuntu 12.04 (ppa)

Image
Krita (Swedish word that means chalk or crayon) is a KDE program for sketching and painting which provides a start-to-finish solution for creating digital art. Krita explicitly supports the following fields of painting: concept art, creation of comics and textures for rendering. I've been using Krita for some time (see here what I've done with Krita) and my experience is very good: it has a "easy to paint" interface; lots of useful resources (brush engines, brush presets, gradients, textures...); tools for drawing (including geometric shapes), selection tools, tools for transforming selections, etc. It also has some image manipulation features like image scaling/cropping and effect filters, so I don't have to use another program (like GIMP) to perform this adjustments. Even though it's a KDE application it works very well on Xubuntu. Its installation will use some disk space (about 300MB for the version available in the Ubuntu repository and 500MB

[HOW TO] Rip VCD in Xubuntu

VCD (Video Compact Disc) is a CD that contains video and sound compressed as MPEG. This MPEG file can be extracted using the vcdxrip tool from the vcdimager package. Install vcdimager Open a terminal window and run: sudo apt-get install vcdimager -y Extract MPEG track This step depends on the source of the VCD (CD-ROM, *.bin, *.ngr, ...). The general command form for extracting the MPEG file we'll use is: vcdxrip -p --nofile SOURCE_OPTION IMAGE_FILE Where IMAGE_FILE is something like /dev/sr0, videocd.bin, videocd.ngr, ... and SOURCE_OPTION is one of the following (between parenthesis is the description, don't type it): -b (bin image file) -c (cue image file) -N (Nero image file) --toc-file ("toc" image file) -C (CD-ROM) Extract example for bin image: vcdxrip -p --nofiles -b videocd.bin The program will extract the MPEG as avseq01.mpg . References Rip VCD to .avi? at Ubuntu Forums What is VCD?

[HOW TO] Encode Video for Android in Xubuntu

Image
HandBrake is a video transcoder and it comes with some presets that provide quick access to some common settings. For Android there are two built-in presets: one for small screen devices and another one for devices with bigger screen. Bellow you'll find how to use them, both from the command line and the graphical interface. USING HANDBRAKE CLI Open a terminal window and run one of the following two commands (!important use capital 'zed'): # Android Small Device (screen size <= 480x...) HandBrake -i video_in -o video_out.mp4 -Z "Android Mid" # Android Big Device (screen size >= 720x...) HandBrake -i video_in -o video_out.mp4 -Z "Android High" USING HANDBRAKE GUI The same task can be accomplished using HandBrake with graphical interface. Just select "Android Mid" or "Android High" from the device preset list after selecting the source file. Related Posts Install HandBrake in [X]Ubuntu 12.04 (deb

[HOW TO] Openraster (*.ora) thumbnails for Nautilus in Xubuntu 12.04

Image
OpenRaster is a file format proposed for the common exchange of layered images between raster graphics editors. It is the default working file format for MyPaint , and it's also supported by application such as GIMP and Krita . Install I created a simple python script (adapting this one , written by David Revoy) that creates the file thumbnail, then all it's needed is the thumbnailer to call the script. Open a terminal window and run: wget -q http://goo.gl/cbXjm -O- | sudo tee /usr/local/bin/openraster_thumbnailer.py wget -q http://goo.gl/nlODH -O- | sudo tee /usr/share/thumbnailers/openraster.thumbnailer sudo chmod +x /usr/local/bin/openraster_thumbnailer.py Related Posts Video Thumbnails for Nautilus in Xubuntu 12.04 Xcf thumbnails for Nautilus in Xubuntu 12.04 References OpenRaster at Wikipedia Krita kra file thumbnailer for Gnome,Nautilus (Linux)

[FIX] Current Window Screenshot (Alt+Print) in Xubuntu 12.04

Image
Problem: In Xubuntu 12.04, the key combination 'Alt+Print' should take a current window screenshot, however it does nothing. Taking a current window screenshot in Xubuntu Install Open a terminal window and run: # configure the sysrq kernel parameter sudo sysctl -w kernel.sysrq=0 # optionally, remove the old keyboard shortcut xfconf-query -c xfce4-keyboard-shortcuts -r -p "/commands/custom/<Alt>Print" # set the new keyboard shortcut xfconf-query -c xfce4-keyboard-shortcuts -n -p "/commands/custom/Sys_Req" -t string -s "xfce4-screenshooter -w" References Alt+Print Screen not working

Install X-tile (window tiling) in Xubuntu

Image
X-tile is an application that allows tiling windows in different ways and works on any X Desktop (Gnome, KDE, Xfce, Lxde, ...) X-tile in Xubuntu: Tile All Triangle Right Some the of the included features: tile checked windows in many ways (vertically, horizontally, grid...) undo tiling invert tiling order command line interface Install Navigate to here and download the "debian/ubuntu package". Then either open it and install it with "Ubuntu Software Center" or open a terminal window and run (adjust the path to the deb file): sudo dpkg -i path_to_deb/x-tile*.deb References x tile

Display keyboard lock keys status in Xubuntu

Image
Indicator Keyblock is an appindicator that displays the status (on/off) of keyboard lock keys (caps lock, num lock and scroll lock). It's very useful when the keyboard doesn't have LEDs to display this information. Install Open a terminal window and run: sudo add-apt-repository ppa:tsbarnes/indicator-keylock -y sudo apt-get update && sudo apt-get install indicator-keylock -y To install Indicator Keylock icon themes run: sudo apt-get install indicator-keylock-ubuntu-mono indicator-keylock-humanity indicator-keylock-elementary -y Run Press Alt+F2 (or run a terminal emulator) and enter: indicator-keylock ( tip: You can add it to Xfce session startup using this as the command, see this ). Note If you unchecked the option "Use an application indicator" and now want it back, run gsettings set apps.indicators.keylock use-indicator true Related Posts Add application to Xfce/Xubuntu session startup References Indicator Keylock Displ

Easy mount disc image files (iso, img, bin, mdf, nrg) in Xubuntu

Image
Mounty allows to mount disc image files (iso, img, bin, mdf, nrg) from the system tray. Some features: Remember mounted images (if selected the disc images will still be mounted after system restart). Load at startup (works with Xfce session, however the '%U' must be deleted from the command; see this if you need help). Use AppIndicator (if unselected, its behavior changes as follows: left-click opens select image dialog and right-click show the options dialog (open, eject, quit...). Install Open a terminal window and run: sudo add-apt-repository "deb http://download.learnfree.eu/repository/skss / #SKSS" && wget http://download.learnfree.eu/repository/skss/repo.pub.asc -q -O- | sudo apt-key add - && sudo apt-get update && sudo apt-get install mounty -y Related Posts Add application to Xfce/Xubuntu session startup References Mounty in Launchpad

[HOW TO] Tablet pressure sensitivity in Gimp

Image
To get pressure sensitivity, open the "Configure Input Devices" dialog ( Edit > Input Devices ) and then set the mode for each tablet device (usually there're 3: stylus, eraser and cursor|touch) to Screen . Related Posts Install GIMP 2.8 in Xubuntu 12.04 (ppa) [HOW TO] Xcf thumbnails for Nautilus in Xubuntu 12.04 Enable Single-Window Mode in Gimp 2.8

[FIX] cmake "CMAKE_CXX_COMPILER-NOTFOUND" error

If you come across this error while using cmake to build from source: CMake Error: your CXX compiler: "CMAKE_CXX_COMPILER-NOTFOUND" was not found. Please set CMAKE_CXX_COMPILER to a valid compiler path or name. It means that you don't have the build tools installed (the g++ in this case). Fix Open a terminal window and run: sudo apt-get install build-essential -y References How to fix cmake "CMAKE_CXX_COMPILER-NOTFOUND" error

Restart/Shutdown/Log Out without confirmation in Xubuntu/Xfce

Image
The confirmation dialog shown in the image below can be disabled and the action (restart, shutdown, ...) will be executed immediately. Disable confirmation Open a terminal window and run: xfconf-query -c xfce4-panel -n -p /plugins/plugin-9/ask-confirmation -s false -t bool Alternative Open "Action Buttons" plugin preferences (right-click on the Xfce panel item and select properties) and uncheck "show confirmation dialog". Related Posts Hey, Where's the Xfce panel restart option? Replace "Session Buttons" with "Action Buttons" in Xfce panel

Replace "Session Buttons" with "Action Buttons" in Xfce panel

Image
Changing the appearance of "Action Buttons" Xfce panel plugin to "Action Buttons" (yeah, redundancy) allows to access "Restart", "Shutdown", etc without having to access a sub-menu. Enable Action Buttons Open a terminal window and run: xfconf-query -c xfce4-panel -n -p /plugins/plugin-9/appearance -s 0 -t int Altenative Open "Action Buttons" plugin preferences (right-click on the Xfce panel item and select properties) and change appearance to "Action Buttons" Related Posts Hey, Where's the Xfce panel restart option? Restart/Shutdown/Log Out without confirmation in Xubuntu/Xfce

Enable editable keyboard shortcuts in Xfce

Image
Keyboard shortcuts for menu items can be changed by hovering the mouse over the menu item and pressing the new key combination for the shortcut. Example: Setting a keyboard shortcut for "Make Link" in Thunar Enable To enable this feature, open a terminal window and run: xfconf-query -c xsettings -p /Gtk/CanChangeAccels -s true Alternative Open Settings Manager , then select Appearance > Settings and check the "Enable editable accelerators" option. Related Posts Edit Xfce Settings with graphical interface

[HOW TO] Xcf thumbnails for Nautilus in Xubuntu 12.04

Image
Xcf is the native file format of the Gimp image editing program. Install To get xcf thumbnails in Nautilus, the gnome-xcf-thumbnailer has to be installed. Then a custom thumbnailer is placed in /usr/share/thumbnailers . Open a terminal window and run: sudo apt-get install gnome-xcf-thumbnailer -y wget -q http://goo.gl/qdhC7 -O- | sudo tee /usr/share/thumbnailers/xcf.thumbnailer Related Posts Install GIMP 2.8 in Xubuntu 12.04 (ppa) Video Thumbnails for Nautilus in Xubuntu 12.04 Openraster (*.ora) thumbnails for Nautilus in Xubuntu 12.04 References Generating Thumbnails for Nautilus using Gimp XCF thumbnailer doesn't work

[HOW TO] Refresh fonts in Gimp without restarting

Image
On startup Gimp loads its own fonts (~/.gimp-X.Y/fonts) and system installed fonts. But there's a way of refreshing the font list without having to restart Gimp. First the "Fonts" dialog must be enabled: Windows > Dockable Dialogs > Fonts Then just use the refresh button positioned on the bottom of the "Fonts" dialog: Related Posts Enable Single-Window Mode in Gimp 2.8 Install GIMP 2.8 in Xubuntu 12.04 (ppa) References Fonts Dialog - Gimp Documentation